Navigation : Home : FoveaPro : FoveaPro Tutorial : Part 3
Image Analysis Cookbook 6.0: Part 3
2.B. Noisy images
2.B.1. Random speckle noise
Random (or mostly random) variations in signal values arise from statistical, thermal, electronic and other effects as an image is acquired. It generally appears as a speckle variation in brightness in regions that should be uniform. Random noise that originates from low signal strength (SEM, fluorescence microscopy, etc.) can usually be reduced by collecting more signal (temporal averaging) but this may not be practical. In an existing image, it is commonly removed by spatial averaging with a Gaussian smoothing (an optimum low pass filter) or by median filtering. The latter is almost always preferred, as it retains edge sharpness and position. The neighborhood size (ideally a circular region) controls the size of noise removed (and the processing time). Specialized routines such as the hybrid and conditional median preserve corners and fine lines as well as edges. In color images, the median has a somewhat different meaning but a similar effect.
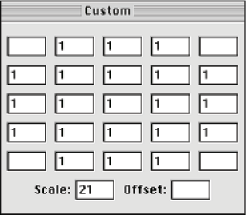
The example is first processed with a simple averaging filter using an approximately circular neighborhood. This is created using the Photoshop Filter–>Other–>Custom function, by entering weights of 1 in the neighborhood of pixels to be averaged (this also serves as an introduction to the creation of kernels of weights, which will be used in other situations that follow). The averaging of the 21 pixels in the neighborhood reduces the speckle noise but blurs the edges.


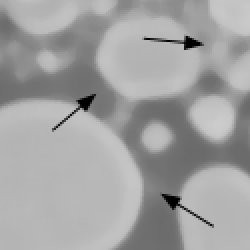
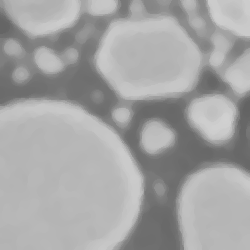
Original Au_Resn image (enlarged fragment) Averaging filter
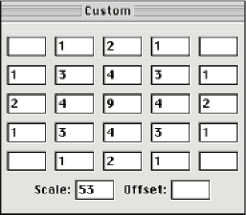
Increasing the value of the weights for the central pixels, as shown in the example, creates a better result, with less blurring of edges for a given amount of noise reduction. The optimum set of weights is Gaussian, meaning that plotting the values would correspond to a Gaussian or bell curve. The integers shown in the example approximate a Gaussian filter with a standard deviation (a measure of the width of the Gaussian peak) of about 0.55 pixels. Larger standard deviations offer greater noise reduction but more blurring of edges. Photoshop offers a Gaussian filter ( Filter–>Blur–>Gaussian Blur ) whose radius can be adjusted and does not require entering the weight factors (and is also faster).
Averaging filter (5-pixel-wide circle) Gaussian filter (std. dev. = 0.55 pixels)


Gaussian filter Median filter (radius = 2)
The averaging and Gaussian filters are “low pass” filters that keep the low frequency (gradual brightness variation) components of the image while reducing the high frequencies (abrupt brightness variations). We will see below that they can also be implemented in Fourier space. All low-pass filters produce some degree of blurring of edges, because high frequencies are needed to make them sharp. A different type of filter that can reduce speckle noise with out blurring edges is the median filter ( Filter –> Noise –> Median ). In the example shown, the radius of 2 pixels produces the same 5 pixel width for the neighborhood as used for the low pass filters, but instead of multiplying the pixel values by weights and adding them, they are ranked into order and the middle value in the list (the median) replaces the original central pixel value. Repeating this for every pixel reduces the speckle noise, but does not blur the edge sharpness. All methods of reducing the speckle in the image produce a histogram whose peaks are narrower, which can simplify the process of thresholding (histograms and thresholding are discussed in subsequent sections).
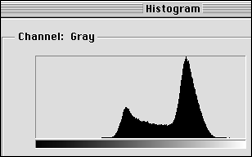
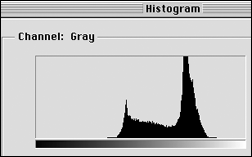
Histogram of original Au_Resn image and after a median filter.
The radius of the neighborhood used for the median defines the size of features that are kept in the image and those that are treated as noise and removed. Increasing the radius value to 5, as shown in the example, further reduces the noise but removes any features whose width is less than that radius. Since the median filter does not blur or shift edges, it is possible to repeat the median multiple times with a small neighborhood, which preserves small features while offering additional noise rejection.
Median (radius 5); arrows indicate features removed. Six repetitions of radius 2 median
There are several variants of the median filter that preserve fine lines and sharp corners better than the basic method. The hybrid median performs the ranking operation with pixels from different subsets of the neighborhood. For example, in a 3x3 (radius = 1) neighborhood, the pixels located in an “x” pattern are ranked separately from those in a “+” pattern, and then the median results of those rankings and the original central pixel are again combined and ranked to select a median value to replace the original pixel. As shown in the example, these methods can reduce speckle (whether due to electronic effects or small details actually present in the original image) without removing lines or rounding corners (as the conventional median does). In the conditional median, pixels whose value is more than a user-set threshold (50 brightness steps in the example) different from the central one are not included in the ranking, even if they lie within the radius specified for the neighborhood.


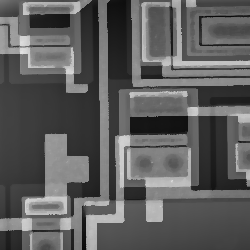
Original Chip image Conventional median, radius = 2 pixels

Conditional median (threshold = 50) Hybrid median
The median filter ranks the pixels in a neighborhood of a grey scale image by the brightness values. For a color image, some programs (including the built-in Photoshop median) also use the brightness value (the average of the red, green and blue channels). But a true color median is also possible, selecting the colors from the neighborhood pixel that is most central, in a vector sense, to the coordinates of all of the local pixels in color space. The plug-in filters use this more advanced logic.

Original C_503 image (enlarged fragment) Application of a color median filter
2.B.2. Shot noise and scan line noise removal
In the preceding example, several single-pixel colored dots are visible in the original image. These typically arise in digital cameras because of dead or locked transistors, which because of the color filter arrays produce a dark or bright pixel in one of the color channels. Similar dropout pixels can arise in interference microscopes due to surface slope, or in a photography because of dust on scanned negatives. This type of “shot” noise can be effectively removed with a median filter, which replaces the extreme pixel values with values from the immediate neighborhood.
Scratches on negatives, even-odd scan line noise from interlaced video cameras, and some scan line artefacts from AFM, are also image defects that can be effectively corrected using a median filter. For a scratch or line defect, a median filter with a radius greater than the line width will replace the bad values. If the orientation of the linear defect is known (for instance, corresponding to the horizontal direction for video scan lines, or the vertical direction for scratched movie film), then instead of the circular neighborhood used for general median filtering, a custom neighborhood can be tailored to fit using the IP•Rank –> HitOrMiss plugin. In the example shown, a neighborhood consisting of each pixel and its neighbors above and below was used to reduce the scan line noise in a surveillance video.

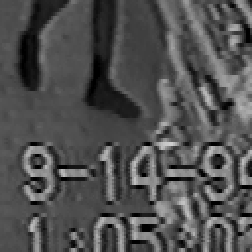
Original Surveil1 image (enlarged fragment) Application of a hit-or-miss median filter
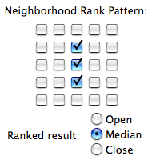
Defining the hit-or-miss neighborhood for the median filter