Navigation : Home : Optipix : Optipix User's Guide : Detail Sharpener
Optipix User's Guide: Detail Sharpener
Most sharpening filters enhance any "detail" that exists in the image. Unfortunately for people who are interested in just textures and correcting slight blurring, this also includes edges and noise. Once noise is eliminated, many people turn to filters like Unsharp Mask to sharpen their pictures (or the Optipix Edge Enhancer, which sharpens edges without enhancing noise). Unfortunately, if edges aren't what you're interested in, then Unsharp Mask is not terribly effective. It is also quite common to see "oversharpening" of the edges while trying to enhance fine detail. This is typically seen as a halo around the edges.
Optipix provides Detail Sharpener to address these needs. Detail Sharpener brings out these fine details, without oversharpening of edges.
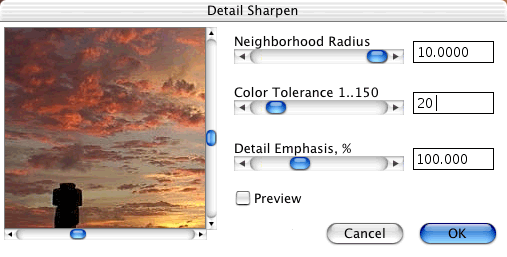
The Detail Sharpener dialog has three controls: the neighborhood radius slider, which controls the maximum size of the detail you wish to enhance, the color tolerance slider, which controls how much color shift is necessary before it is considered "detail", and the detail emphasis slider, which controls the strength of the sharpening. The dialog above has some good initial value to work with - 10, 20, 100%. When applied, the results look like this:

Note that the detail in the clouds has been brought out, adding depth to the image, especially in the brighter areas, and the shadow detail in the stone have also been enhanced. The differences are fairly subtle here, and depending on the quality of your display, may not be visible. We can bump the detail emphasis up a little bit to give a sharper image that will demonstrate not only the type of detail that is enhanced, but also to show how well the plug-in behaves at extreme settings.
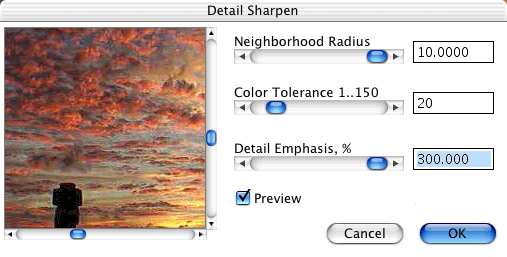
Now, the detail has become almost too sharp, and the enhancer has found the JPEG artefacts and enhanced them slightly as well, but sharp edges still have not acquired any haloing. Let's compare this to Photoshop's built-in Unsharp Mask with similar settings (100%, radius 10, threshold 0).
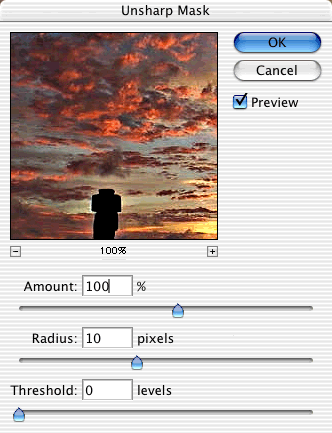
Notice that while the Unsharp has sharpened the detail, it has also brightened the reds and darkened the blues, in addition to adding the whitish halo around the stone in the lower left. This effect becomes greatly pronounced when you use settings as absurd as we used on the Detail Sharpener above.
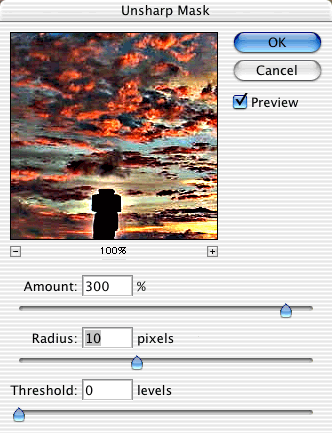
Note that the halo around the stone post is quite prominent, and you can see the haloing around the edges of the clouds now as well. A fade will reduce these halos, but not remove them, at the cost of losing some of the sharpness that was added. We have found that oversharpening with Detail Sharpener, and then fading produces good results.
Using Detail Sharpener to compress dynamic range
The problem with blending multiple images to create High Dynamic Range (HDR) images is that printers, even high-quality photographic printers, cannot represent that much dynamic range. Naively throwing away that depth, such as by converting from 16 to 8 bits in the Photoshop Image > Mode menu, will usually give very poor results. We want to reduce the tonal range while preserving the important details. Detail Enhancer will allow you to do just that.
Included on the Optipix CD is an action called "Reduce Dynamic Range." This action uses the Detail Sharpener tool to enhance shadow and highlight detail, but at the same time reduce the overall tonal range. In the images below, the dark portion of the river and the shaded areas on the far side of the canyon lack detail before the Reduce Dynamic Range action is used.
Once the action is run on the image, you see that the detail in these shadowed areas in enhanced. The overall dynamic range of the image has been reduced, however, and this picture can be run through a high-quality printer without significant loss of detail. Feel free to play with the action on the CD, and use it in your own workflow.
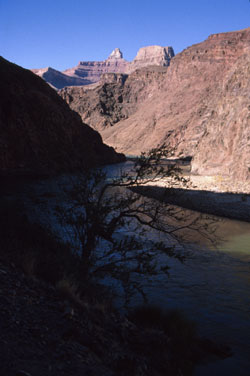

Before dynamic range reduction (left) and after reduction (right).
Next: Grain Maker
Prev: Photoshop Actions
Up: Optipix