Navigation : Home : Optipix : Optipix User's Guide : Photoshop Actions
Optipix User's Guide: Photoshop Actions
Reindeer Graphics™ Optipix is designed to take full advantage of the capabilities of Photoshop. Actions are one such capability. An Action is a sequence of steps that can be played back as if you had done them yourself. Many kinds of operations (other than painting, erasing, and using the lasso tool) can be recorded in an Action. Actions are grouped into "Sets" that can be saved to disk, sent to other people, and reloaded. Actions can also be assigned to function keys for easy access.
Much of the power of Photoshop comes from Actions, since they allow you to cut the amount of time it takes to do repetitive tasks. You might, for example, spend time enhancing one image from a roll of film, then record that sequence of steps as an Action that can be applied to every other image in the roll. Since Optipix allows you to record the values you've entered manually in the Action, you don't have to enter them again for each successive image.
Actions can be created quite easily by recording a series of steps. Here is a walkthrough of the procedure.
- Windows > Actions. This brings up the Actions palette.
- In the Action palette, select the menu triangle at the top right of the pane.

- Select the item "New Action" from the menu
- A dialog will appear asking for the name of the new action you're about to create.You can pick the name of your action, the set, or group of actions, to which you want it to belong, and which, if any, function key you'd like to assign to it.
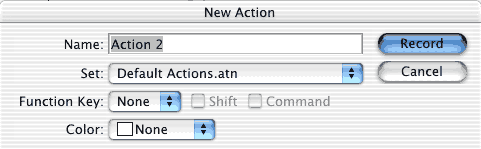
The "New Action" dialog - Click the "Record" button on the dialog and your next sequence of operations will be recorded as an action
- When you've finished with the sequence of operations, you have to tell Photoshop to stop recording.Click the Stop Recording button, which is the button with the black square on it located at the left of the line of controls. In order, the other buttons are the Record button, the Play button, the New Set button, the New Action button and finally, the Delete button.

The controls for starting and stopping action recording are at the bottom of the Actions palette. - Your action is now complete. It might look something like this:This particular action is useful for enhancing grainy digital images.
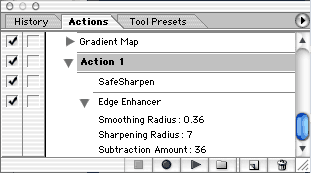
This recorded action consists of a Safe Sharpen step followed by an Edge Enhancer step. Notice that the parameters for Edge Enhancer were recorded as well. When you play the action, it will use the recorded values instead of asking you to select new values in a dialog. This will allow you find an optimum setting for a group of pictures and automatically process them. - After you've finished recording, you can drag the Action items around to rearrange their order, drag some items to the trash can icon to delete them, or turn recording back on to add more steps. To do these things, use the buttons at the bottom of the Actions palette.
- Finally, you can play back your action by selecting it and pressing the Play button or by pressing its assigned function key if it has one. You can run your Action on a single image or in Batch mode on a folder full of images or even on each frame of an Adobe Premier movie.
There are many more things you can do with Photoshop Actions than we've mentioned here. Look in the Photoshop manual for more tricks and examples.
Next: Detail Sharpener
Prev: Edge Enhancer
Up: Optipix