Navigation : Home : Optipix : Optipix User's Guide : Blend Exposures
Optipix User's Guide: Blend Exposures to create an HDR image
The Blend Exposures plug-in uses two aligned images that have different exposures to create a new image with greater detail in the range from highlight to shadow than either of the two original images. The example below shows the improvements this can make in the resulting image.
The ideal combination for this procedure consists of two digital camera images, one overexposed to get detail in the shadows and one underexposed to get detail in the highlights. If the images are taken on a tripod in rapid succession (using the auto-bracketing function on most digital cameras) they will be perfectly aligned and no post-exposure alignment is necessary. In some cases, guaranteed alignment is not possible. Optipix includes a plug-in that is useful for correcting the alignment of two exposures. For instructions on how to align two images using Optipix, see this guide page.
The procedure for using the Blend Exposures plug-in is as follows:
- Open both exposures in Photoshop and select the underexposed image as the active photograph
- Choose Filter > Optipix > Setup 2nd Image
- Select the overexposed image
- Choose Filter > Optipix > Blend Exposures
- Choose Image > Duplicate
- Rename the image and save to disk
This method not only works well for digital camera images, but also for scanned slides and negatives. Scan the negative twice, once for overexposure and once for underexposure, and apply the above routine.
Another useful trick is to convert both images to 16 bits per channel (if they weren't already) after step #1. Portions of the images that are in the middle range between the highlights and shadows will be blended and noise/grain will be reduced. This is a good time to adjust the gamma or curves in the image, before eventually coming back to 8 bits.
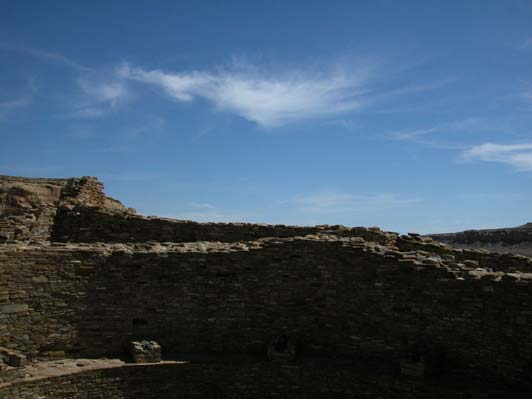
In the above image, there is nice detail in the clouds, but the shadows make the detail in the stonework difficult to see.
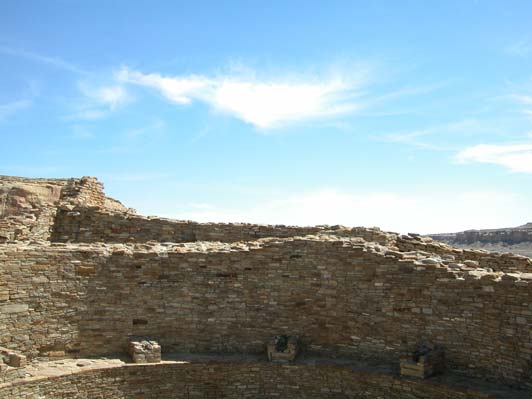
Notice in this image that the clouds have no detail, but the detail in the stonework is very sharp.
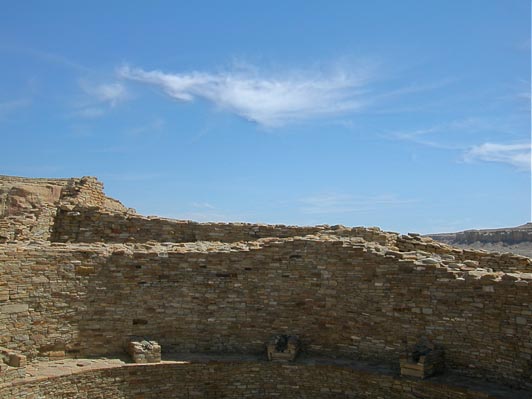
The above image is the result of blending the overexposed and underexposed images. Now it is possible to see the detail from the clouds and the stonework at the same time. However, we're still not using the complete dynamic range of the image. If we follow this step with Auto Contrast, we get a very pretty result.

This last image is the result of applying Auto Contrast to the blended image. While the change here is subtle, the image now uses the full dynamic range available.
Blending more than two images
It is sometimes useful to blend more than two images together. In cases where the darkest and lightest images are more than 4-5 stops apart, it can be helpful to include a third exposure that is normally exposed. The best technique for blending three images pairwise is one that minimizes the overall difference in exposure between any two pairs. In the case of three exposures, the workflow would be as follows, given images A (darkest), B, and C(lightest). First blend A and B. Then blend B and C. Finally, blend the results from the two previous steps, (A&B) & (B&C).
This procedure can be generalized to any number of exposures. We call this technique "rolling in," since you roll the exposures to the center from lightest and darkest. In the case of 7 images (A - G), each image exposed at one stop difference, the workflow would go like this:
- Blend A + B
- Blend (A+B) with C
- Blend ((A+B)+C) with D
- Blend G + F
- Blend (G+F) with E
- Blend ((G+F)+E) with D
- Blend (((A+B)+C)+D) with (((G+F)+E)+D)
When blending images in such a fashion, it is critical to make sure the images are in 16 bit mode, even if the images themselves are 8 bit. This will provide plenty of precision in which to place the extra dynamic range you are adding. At this point, you'll have a High Dynamic Range (HDR) image, and you'll want to treat it as such. The Reduce Dynamic Range action on the Optipix CD might be useful if you want to print the image, or reduce it to 8 bits for a webpage.
Next: Interactive Interpolation
Prev: Auto Contrast
Up: Optipix